Note
This is a long post covering the process I went through to get my eye prosthetic built. A seprate post covers the actual construction of the final piece.
On Tuesday of this week, Cheryl and I visited the M. D. Anderson Parts Department, also known as Dental Services, to begin fitting my artificial eye. Boy, was this a weird experience. The formal name for the folks who do the work is "anaplastologists". They build all kinds of facial things, ranging from eyes to lips, ears, anything that gets zapped by cancer and needs to be reworked to give the patient a better look. That is me!
Day 1: Basic Eye Construction
The stop on Tuesday was fairly short. We started off by visiting with Dr. Chambers, the head of this department, who took my history (why do medical folks keep taking things from your? History, Vitals, Blood! This time, they are giving me back something, so I guess it all works out!)
Dr. Chambers was a very nice guy, whose job is to make sure the work gets done properly (and the insurance companies approve everything!) His visit was fairly short, then he handed us off to Peggy and Pattii, his two best anaplastologists, who do the real construction work. We were guided down the hall to the lab where the fitting work is done. This is one of two rooms they use. One is where the patient sits and gets measured, photographed, measured, poked, measured, stared at, and other fun things as the procedure proceeds, and another room where they actually cook up the parts. We have not seen that room yet, but may at some point.
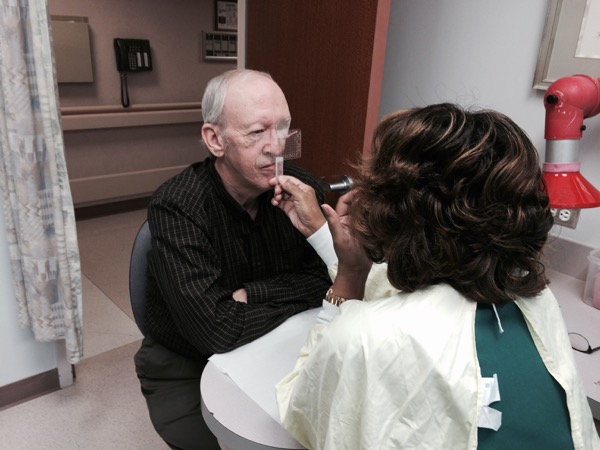
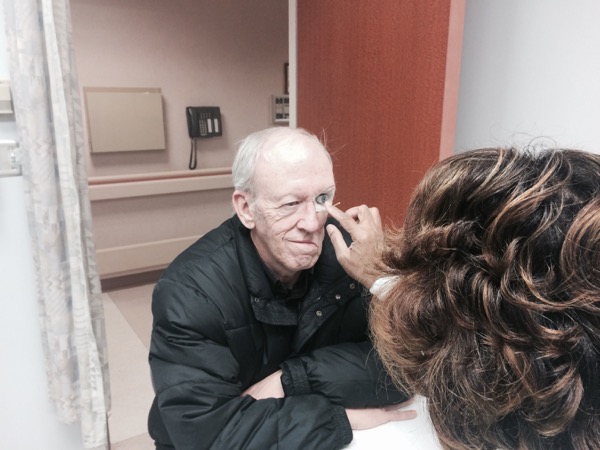
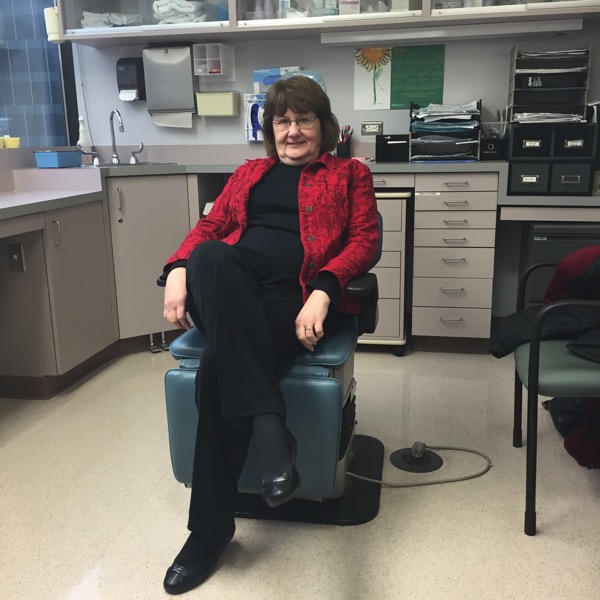
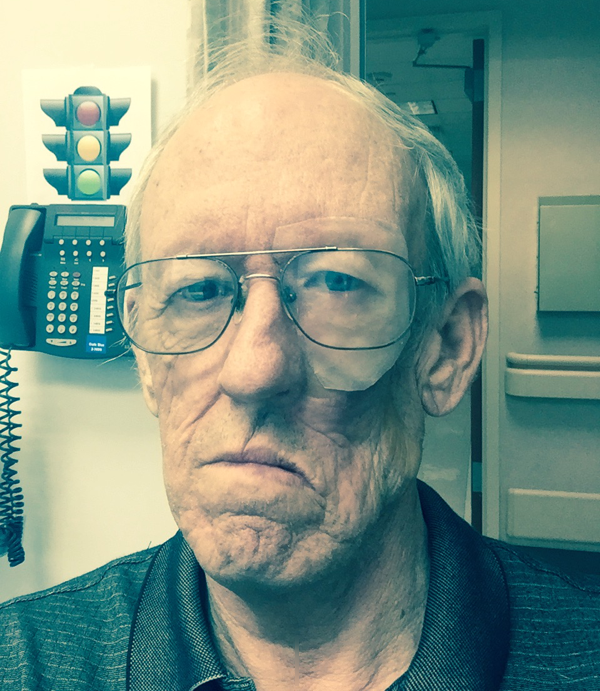
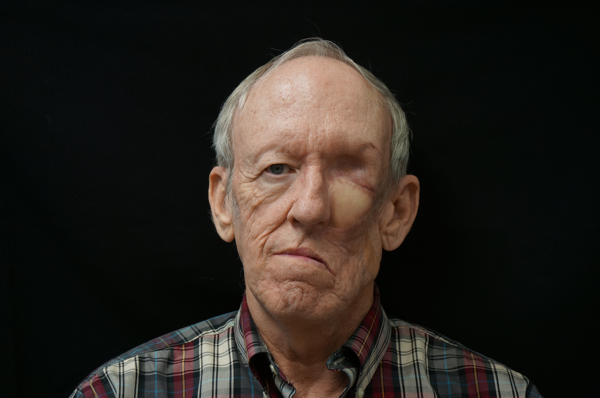
Here is me, getting ready for the adventure:
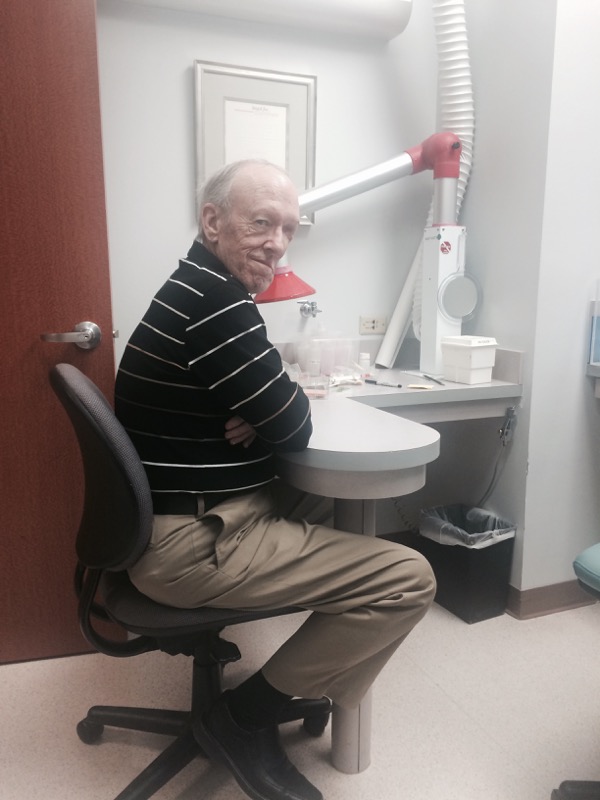
I still look like I got hit by a train!
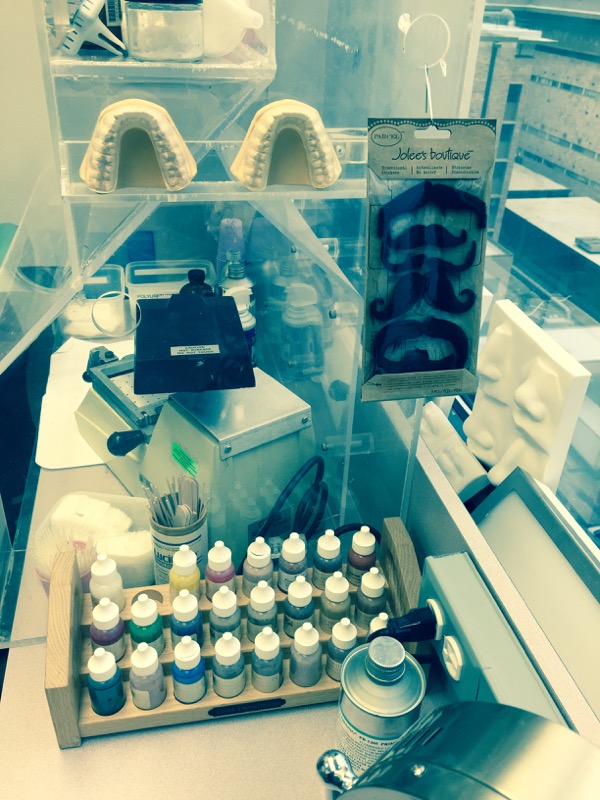
The lab room where we stayed was set up with all kinds of parts, including eyelashes, moustaches, and a bunch of other tools and weird things that they use in their work. This room would make a cool workshop for some of the things I build, so we took pictures of the layout:
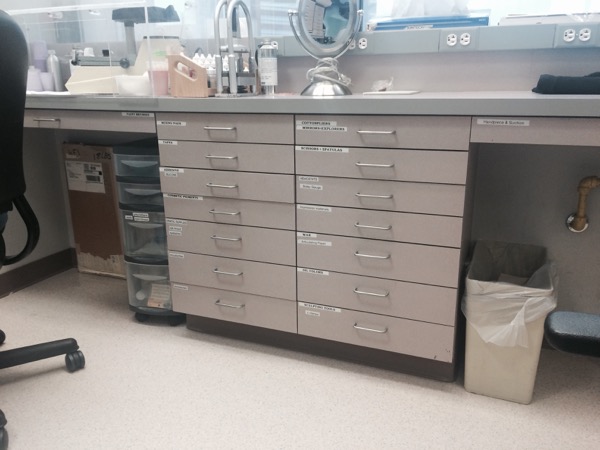
I peeked into one of these drawers, then shut it right back up. It was full of stuff you would expect to see in a Hollywood dressing room with special effects work going on!
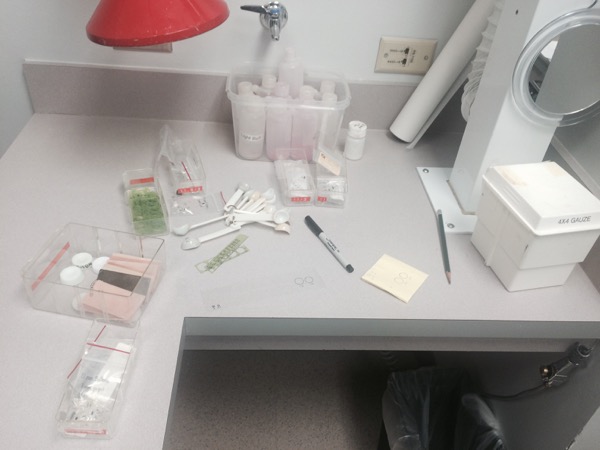
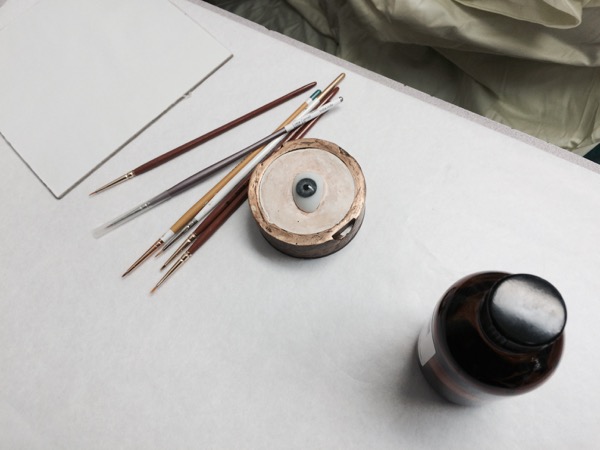
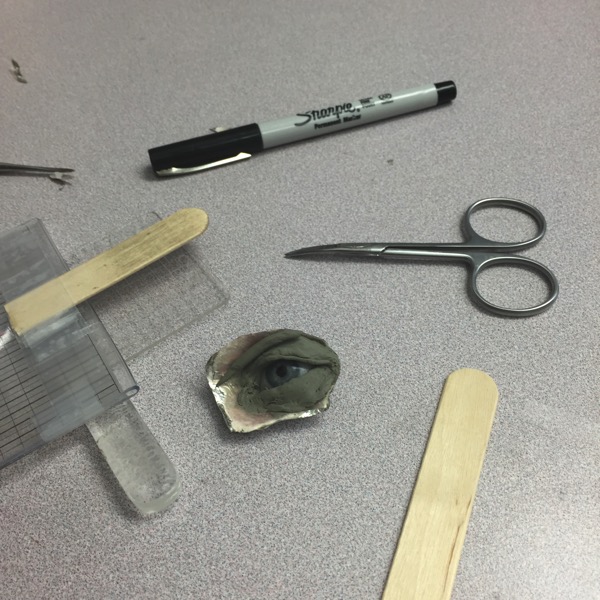
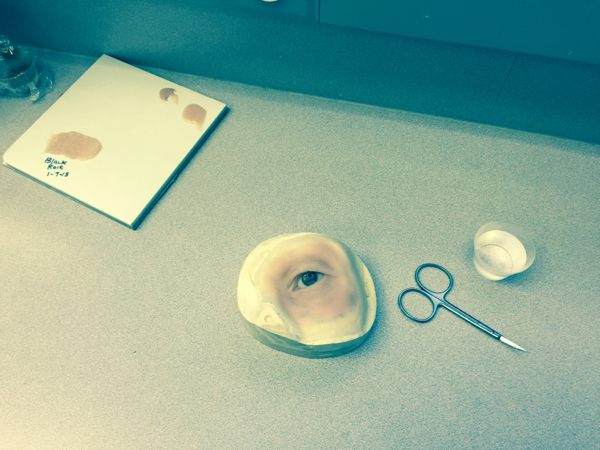
Here are the tools they use to set up the replacement eyeball.
Peggy started off by figuring out how big the iris needed to be. They used the circle templates to pick the right diameter, and used a bag of iris parts to select the one with the right pupil opening. Unfortunately, this new pupil will not get bigger or smaller as light levels change. You can see a bunch of eye molds on sticks on the table. They selected one with the right coloring to match my other eye. All of these parts were used to mold the new eye out of a glass material. There is a bit of artwork in this step (which we did not see) where they match up the lines in the iris using digital pictures of my other eye. We had a debate about my eye colors. I have always said my eyes were hazel (a color I could not pick out if I really had to), but Peggy told me it was more blue with streaks of gray. (Old age, I guess!). Anyway, she got the colors right in the end. Peggy and Pattii took turns sitting in front of me comparing the new parts they picked out to my good eye. Pattii seems to be the one doing the actual construction work, and Peggy, who we found out has been doing this for 32 years, made all the decisions about what to do! (I asked her how many eyes she had made in that time, but she was not keeping track, I bet it has been a bunch!)
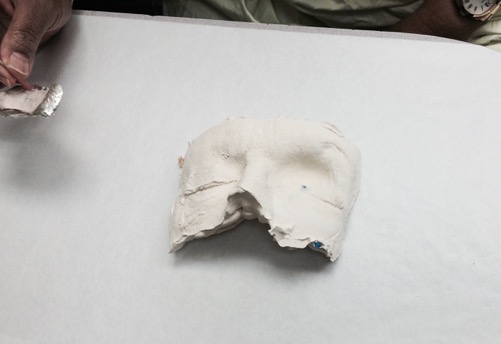
The last thing we did today was build a plaster cast of my face so they could use it to build the rubber parts that will hold the glass eye and end up glued to my face. This process involved what Cheryl said was just like the work we did on the KC house over Christmas! They painted my face with a release agent so nothing would stick, then squirted orange and blue rubber out of tubes with what looked like caulk guns, until they had my entire face around both eyes covered with goo. I had to sit there with this stuff on my face while it all set up, then they peeled it off and took it away. I had my eye closed the whole time, so I never saw any of this. This rubber mold was used to build a plaster cast of my face, complete with wrinkles and every detail. Pure Hollywood!
Here is the end result of all of this work:
Day 2: Fitting the Eyeball
This morning started with them bringing in the plaster cast of my face, together with a chunk of aluminum foil molded into the depression where my old eye lived. They use this foil to size the actual patch they will build that holds the glass eye. We also got our first look at the new eye, and it was an excellent match. The glass eye is only big enough to be visually complete, but is only about a quarter-inch thick, and curved on the back side. Since I have new skin over where the eye used to be, they have to keep things thin enough that the eye looks right. Too thick and it will be sticking out, and would look weirder than necessary.
Peggy took more measurements of the glass eye and checked to see how it was going to look on my face. It needed a bit of trimming, which they do by grinding and polishing the glass. Once they have the basic eyeball ready, they need to paint it up with fake blood vessels. This is they way it looks just before that step.
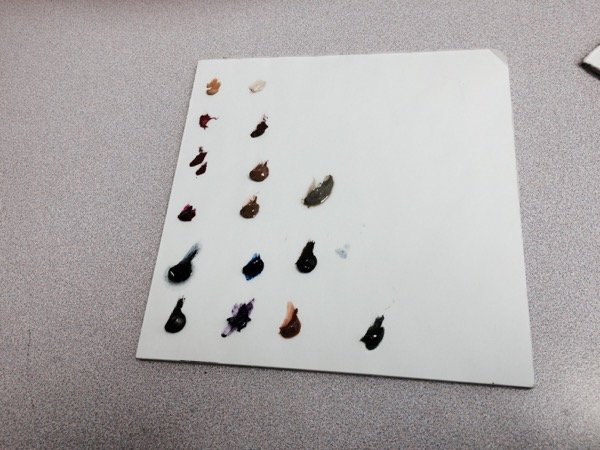
Here is the paint palette Peggy used to paint up the glass eye:
Figuring out exactly where the glass eye needs to be placed took quite a lot of time. Peggy attached the glass eye to a rod and worked out the placement, then stuck it to the foil holder with modeling clay. She had to place it, measure things, then move it a bit and check alignment with my other eye. The whole process took several hours.
This is Peggy using a plastic grid to check measurements from my nose to my right eye, which she used to place the new left eye.
After the position was worked out, Peggy took measurements of the glass to make sure it was sized right. We took a break for lunch while they baked the glass eye to cure the paint. It was going to take about two hours waiting for the baking to finish before we needed to be back in the room.
This next shot is pretty weird looking. Cheryl said it looked like I was staring! The glass eye is stuck in clay and Peggy is working on the depth alignment. She stuck more clay behind the glass to push it out, then pushed it back in as needed. You can see the foil patch they will be using to set up the final mask later.
It was pretty cold in that room where we waited, so I had to put my coat back on. I thought Texas was supposed to be warm!
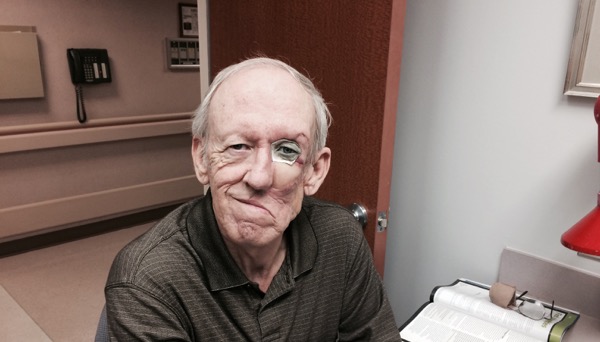
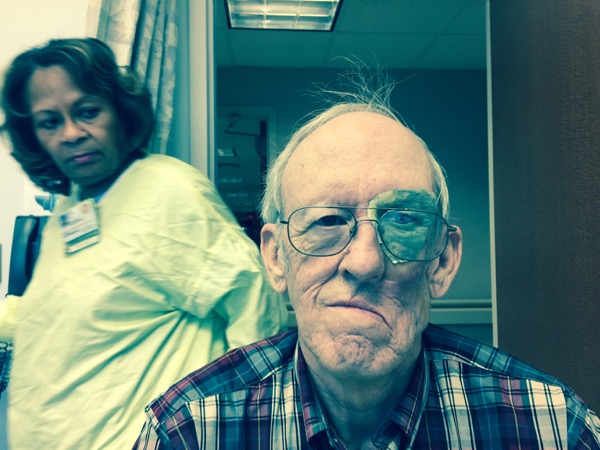
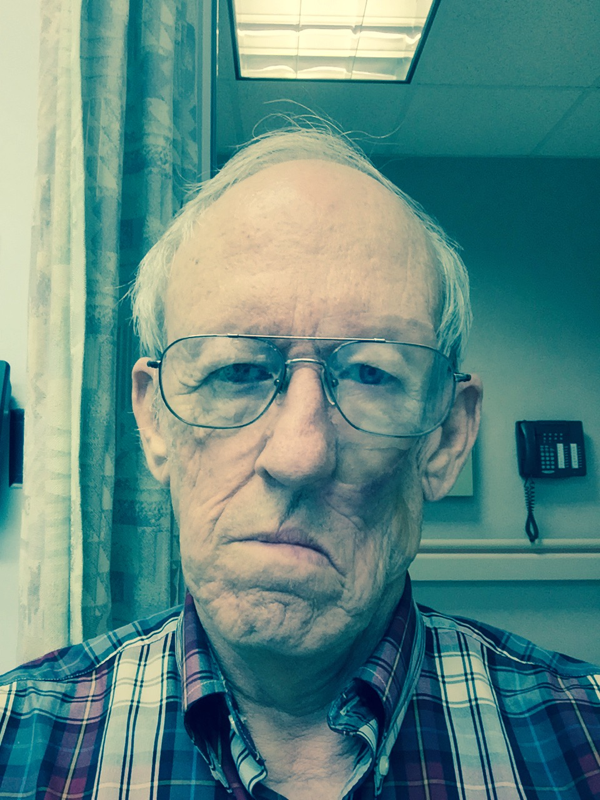
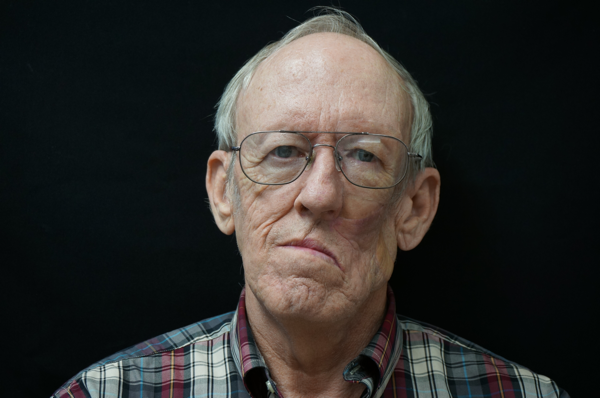
Looking at this picture, I seem to have a split personality going on here. One side (the one that did not get hit by a train) looks pretty happy, but the other side looks kind of sad. Dr. Yu was going to work on pulling the edge of my mouth up, which would help keep me from drooling when I drink things, but decided to put that off when he did the reduction surgery. We may revisit that later. Anyway, the eye actually looks pretty nice, and when they get it all done, may actually make it easier to be seen in public. My glasses will hide some of the new eye and make it less noticeable.
The biggest thing that will be obvious to other people will be when I look to the side, and the eyes will not track together. Oh well, most of the time it will look fine, unless I want to mess with someone by looking at them sideways on purpose to see how they react. (Gotta have some fun in all of this!)
At the end of day 2 we had the glass eye finished, and placed in the mold about as accurately as possible. Peggy used more clay to build the start of the mold she will build to construct the artificial skin that will cover the patch and create my new eyelids. More fun to come, but we get tomorrow off, since it is New Year's Day!
Chery and I left around 4pm, visited my favorite Microcenter toy store for a break, then had dinner in a nice little Italian restaurant we spotted. After that, we settled in to ring in the new year in our motel room. Surprisingly, we were both pretty tired from sitting around all day!
Day 3: New Year's Day
Today we have a break, so Cheryl and I spent the day doing a bit of work on our PCs. We brought four laptops! Cheryl is moving from an old PC to a new one I set up for her, and I have a Mac and a PC I use in my teaching. I need machines as much like those my students use to make sure I can get them set up to do their coursework!
Day 4: Building the Face Parts
With the glass eye pretty much completed, we switched gears to building my new skin. This will be a chunk of rubber that they will sculpt to look as much like the rest of my face as possible, then create the eyelids around the glass eye so everything looks real. I get to glue this whole thing to my face each day, and peel it off in the evenings. They will be painting it to match my real skin. I found out I may need to have it color adjusted as I get tanned up, or as the sun fades the fake eye. Wow, I may need to retire and move to Houston for all this work!
We started off the day with a bit of a joke. Cheryl and I went shopping for scrapbook supplies at a local Michael's near the motel. (Cheryl does outstanding scrapbooks as a hobby!) I spotted some stick-on moustaches, and thought it would be cute to give them to Peggy and Pattii as a present, to augment their two drawers of moustaches that I spotted before. When we gave the stickers to Peggy, she inspected them and said "We can use these!" I was caught off guard by that! The stickers were made of felt, but she said they could trim them and use them as patterns. Anyway, we got a laugh out of the whole thing.
Here they are, now ready for action:
Look to the right of the stickers. You can see molds with noses, lips, and ears they use for other patients leaning against the window.
There was a bit of a problem today, that I did not expect, but Peggy told me is pretty normal. When I got to the lab, the area around my left eye depression was a bit swollen. That meant that all the fitting they did before New Year's Day was off a bit. Nothing fit exactly right today. So, Peggy did some trimming on the foil mold to deal with this issue. Apparently, this was caused by me sleeping more on that side the night before. I mentioned that I try not to sleep on that side, since my now disconnected jawbone tends to move to the side when I do that, causing my teeth not to line up. I end up with my lower teeth sitting on the roof of my mouth! (Try doing that with a normal jawbone. You cannot do it!) Peggy asked me if anyone had suggested some kind of dental appliance that might stop this, but no one has.
Much of the work today was focused (!) on making sure the eye was placed right when they started building up the eyelid area with clay. This involved placing the glass eye in the right spot, stuck to the aluminum foil mold with a little bit of clay, then adjusting it with a crowbar. Well, actually, they used a small spatula, but the action was to stick the spatula into the clay at the edge of the glass and pry it sideways or up and down as needed. Sitting there while all of this was going on was strange. I kept seeing one of them poke my new eye with a stick of some sort, and my mind wanted me to blink to keep that thing out of my eye! Funny how your mind works!
Pattii seems to be the PC guru of the team. She took many digital pictures of my face, then went to the other room to fire up PhotoShop to play with the images. They use this program to flip the images back and forth to see how symmetrical things are. Your face is not entirely symmetrical, but small differences can be surprisingly obvious when you look at someone. So, they spend a lot of time making sure the glass eye is in exactly the right spot. Tedious work!
This picture gives you a good look at my new split personality. Cover one side, then the other to see what I mean. Part of me is happy, part is sad (or mad!) I do not know if we will be able to fix this or not, I may try later. My nose is sort of pushed to the side as well. I told Peggy that was not the result of a fight, it was the train wreck I went through! Overall, the new eye will look pretty good when they get finished, especially with my glasses on!
Once again, Cheryl and I spent a lot of time waiting while the team figured out what needed to be adjusted next!
After lunch Peggy told me that one of the dental doctors was going to look into my mouth. My first thought was that this alignment process was about to get really complicated if they were going to move things from inside my mouth! But her idea was for him to see if he could come up with a way to stop my jawbone movement issue when I sleep! Dr. Cardoso (number 35, I always number my doctors!) came in, looked around, and suggested that we build a mold of my mouth area on the good right side, and see if he can build some sort of rubber gadget I can put in when I sleep that will stabilize things. Sounds like a plan, so we will be doing that next week.
After getting things as aligned as we could, the team sent us home until Monday when we will start up again. Cheryl and I drove back to Austin for the week end. I will drive back on Sunday and spend another week at this process while Cheryl goes back to work. She is burning a lot of leave time staying with me at M. D. Anderson, but this trip is pretty tame, and she was there for the start. She gets to see the final result as a surprise when I get back home!
Day 5: More Fitting Work
I drove back to Houston on Sunday afternoon, to avoid driving in the dark. I can do that, but with my lack of depth perception, it takes more concentration to drive in the dark.
Besides, I got to make a couple of stops along the way.
One place I decided to visit on the way over was the airport at our usual rest stop in La Grange, Texas. We kept sailing past the airport sign, so this time I decided to at least drive out to the airport for a peek. It was the usual small town one runway airport with a few hangers, but it had a neat display at the entrance. This is an old USAF Thunderbird jet, an F100 that dates back into the late 1950's. I remember seeing this plane in a few air shows when I was a kid:

Monday morning, I was back in the lab for more work on fitting the eye. Today was pretty much like the last visit. I sat there while both Peggy and Pattii worked on fitting the clay mold into the depression where it will live. This process is tedious, and involves sculpting the clay to make it look as much like the good right side of my face as they can, and lining the eye up so it looks natural. It also involves working out exactly how big the thing will be. There has to be enough surface area for the glue (a water based glue like Elmer's) will hold the weight of the appliance on my face. If I move too hard, or sweat too much, it will come loose, and I will need to either re-glue it, or revert to my old eye-patch.
I was starting to feel like we were not making much progress, but this is a shot Pattii took just before lunch, and it does look pretty good (except for the color):
Also before lunch, Dentists Dr. Cardoza (number 35 in my doctor numbering scheme) and Dr. Yun (number 36) came in to make an "impression" of my mouth. This was normal dental stuff, involving putting a bunch of silicon goo into a mold, then shoving it into your mouth and over your teeth. They did one on the upper right and lower right side of my mouth. There are no teeth on the upper left side anymore, they all went bye-bye in the surgery a year ago.
Dr. Yun pried out the two trays, and left to work on the mold they will use to build me some kind of appliance that might help keep my jaw aligned when I sleep. When I looked at myself in the mirror after he left, I thought Cheryl had blasted me with the caulk gun we used over Christmas at our KC house! I had white stuff all over my lips that was durned hard to get off.
The day ended with Peggy feeling like she had a pretty good shape for the patch, and had the placement figured out.
Day 6: Final Fitting
Tuesday started off as usual, more fitting work. They add a bit of clay, compare it to the right side of my face, check alignment, trim off some of the mold, add some back on. It is a process! We had one minor event to deal with that was not expected, though.
Last week, as we started this process, Peggy spotted what looked like a piece of suture at the joint between my normal face and the flap they used to cover my eye socket (from my leg). The place where she pulled the suture looked pretty red this morning, and got worse as the day wore on. Although the redness might have been caused by the fitting work, it started to look bad enough that Peggy asked Dr. Chambers to look it over. He came in and thought it looked like an infection. He poked around looking for signs of a suture, but found none, so he sent off a sample for testing (Oh great! More waiting for test results!) He left me with a salt-water solution to wash it in and prescribed an antibiotic for me to get rid of the infection.
Dr. Cardoso got to write the prescription, and he was pretty amused that I called him "number 35". He commented that Dr. Chambers must be "number 37", since he came in after he and Dr. Yun saw me. I had to burst his bubble by telling him that Dr. Chambers was "number 34", I saw him last week. All in all, Dr. Cardoso thought is was cool being "number 35". I like to amuse my doctors any way I can!
At the end of the day, Peggy and Pattii were happy with the basic layout of the mold, and started mixing up a silicon mixture that will be used to color the final mold they make that I will end up wearing. They did not have a good Sherwin-Williams color chart, and had to do it old-school, by mixing up paint artist style. A dab of this, a drop of that. They used red, pink, blue, yellow, purple, an amazing collection of colors and what came out looked just like my old skin! They use this mixture in the final construction step, which I will not get to see. I get Wednesday off while they bake up my new eye patch.
Here is the final fitting, ready for the next step:

With any luck, I might go out and see my F4D at Ellington Field tomorrow. Hopefully, the engine is back and ready for installation. If not, well, I have a lot of school work to do to keep busy!
Day 6.5: Waiting Game
Today, I had time off while they bake up my new eye. I used the time to explore a hobby shop, and an electronics supply store that looks like a good source for parts for my robot projects. And, I had an interesting Facebook conversation with John Guelhstorff and Jeannie Grace, two friends from back in my horse owning days in Council Bluffs, Iowa. John posted this picture from a Competitive Trail Ride we went to near Kansas City way back when:
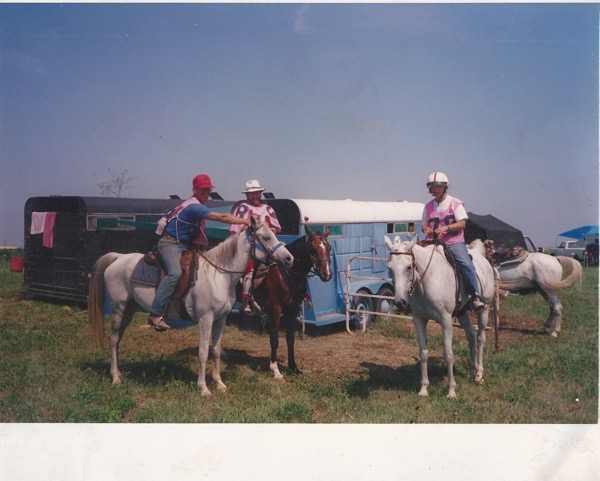
That is me in the red hat, with my Arabian mare, Gaizi. She and I rode all over Nebraska, Iowa, and eventually New Mexico for over 20 years. I miss that sweet horse (who adopted me as her child when she had her first baby).
Gaizi lived until she was about 26 years old, and lived on John and Jayna's farm in Council Bluffs. This is Pony Creek Farm, home of a bunch of horses I owned over the years. These two are great friends, even though I do not get back there much these days!
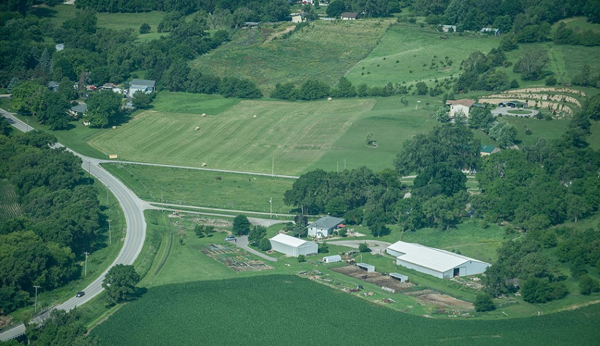
I found this image on John's Facebook page, and most of the farm in behind this view. However it does show the horse barn where Gaizi lived most of her life (except for a short stay in New Mexico!).
F4D Checkin
I did call over to the Collings foundation to check on the status of my F4D, and found out that the engine is back, it is installed, but they are waiting on parts for the ejection seats before it can fly again. Perhaps that will happen soon, but nothing happens fast when dealing with parts for a 50 year old fighter jet! It is wise to make sure we get the best parts possible when flying this craft, so I can wait. My big challenge will be getting good weather and all the people I need to be there all at the same time!
Then, maybe we will do some of this:

The website where I found this image (http://www.projectoceanvision.com/vox-05.htm) labeled the F4 as the "World's leading distributor of Mig parts"! The Russian Mig-21 was the Soviet's best fighter when the F4 was king of the sky! These two craft did battle over Viet Nam for years (and we usually won!)
It is powered by two of these brutes:

Rebuilding one of these is what has kept me on the ground for over six months while they replaced a few blades from the turbine and rebalance the whole thing. That took time to do, in between paying customers. It is hard being a non-profit and trying to do things on the cheap!
Sigh! I spent the rest of the day working on my website for next term.
Day 7: Final Eye Fitting
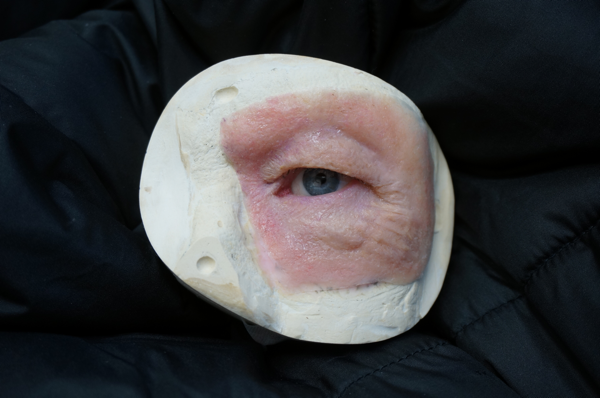
First thing this morning was a look at my new eye, ready for trimming to the final size. This was my first look at the thing:
That is a stick sitting in the middle of the eye, used to place the acrylic eyeball in the mold as they form the silicon skin.
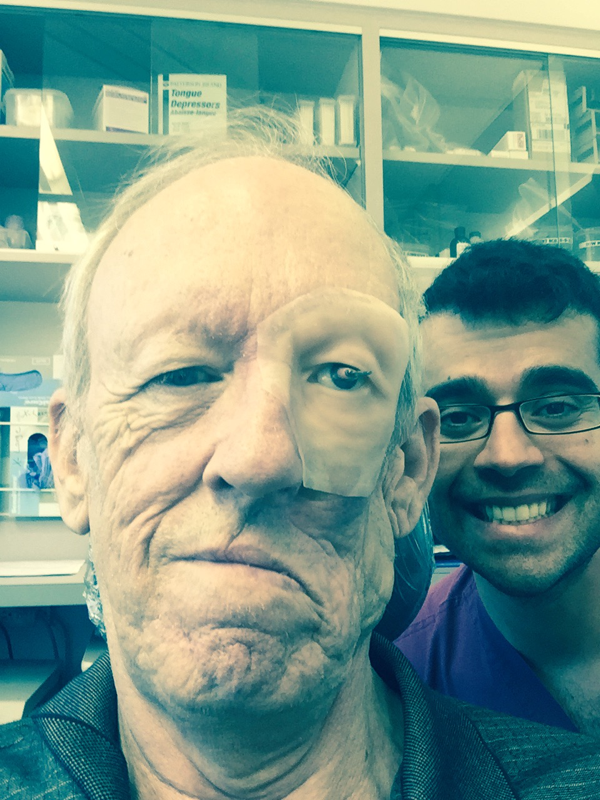
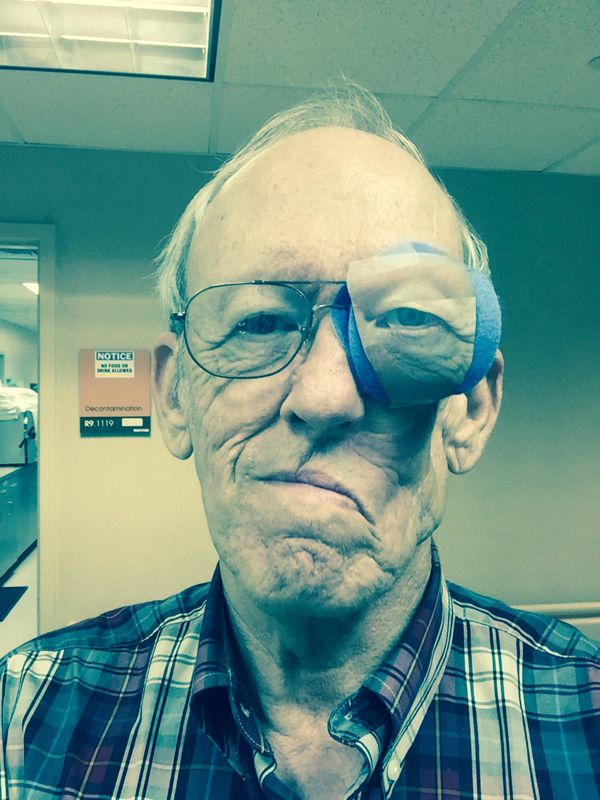
This is what it looked like on my first fitting. (That is Dr. Cardoso peeking in on the side. Number 35 seems to be into selfies!) Except for the stick, it looks pretty good.
Pattii took a bunch of pictures of the baking process they went through yesterday. I have split that process out into a separate blog article since most folks who read my blog are probably old enough to need a nap about now, so I will try to keep this post a bit shorter.
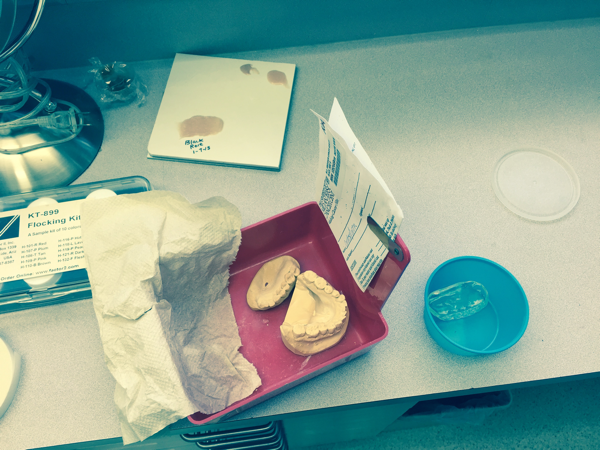
I keep calling this area the "parts department". Dr. Cardoso brought in my new dental appliance for a test fitting, and it works pretty well. I am to try it out tonight and see if it does the job. Here are more of my "parts" sitting on the counter:
Most of the day was spent sitting across from Pattii who basically used oil paints to start turning my new face from a 20 year old version with perfect skin into the old geezer I currently am! She used double-sided tape to stick the new chunk of face onto my old face, then used me as an easel while she painted directly on the silicon skin. By doing things this way, she could always look at my current right side while painting on the left side. It was another "process" that took quite a while to do. Every once in a while, she would go off and cook the piece to permanently fix the paint to the silicon, then come back for another round of painting. They have not done the final trimming yet, but are working out where that will be based on the lines in my face. Cute! Pattii says this part adds "character" to the new face part and make me look like, well, me!
Part of this process involves using Photoshop to flip my right side image to my left side then comparing what they see to the actual part. This helps Pattii make things look more natural, even though faces are not truly symmetrical.
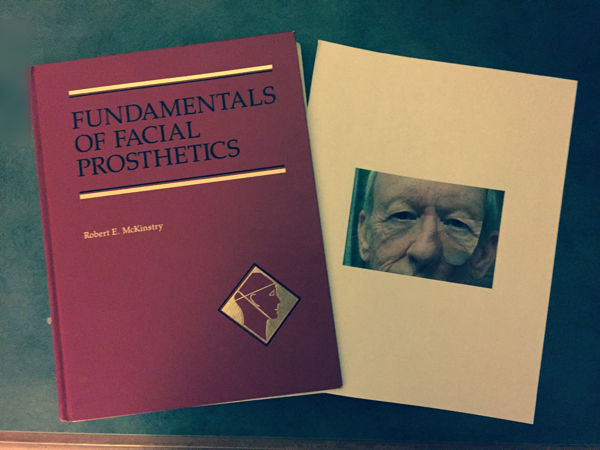
Here is a book Patti loaned me that describes the entire process they use, plus a picture of a print of a screenshot from Photoshop! Phew!
Here is what I looked like at the end of this day:
As you can see, we still have some trimming to do tomorrow.
Day 8: Adding Character
Today's quote:
“It's not how hard you hit. It's how hard you get hit...and keep moving forward.”
― Randy Pausch, The Last Lecture
I am pretty sure I got introduced to Randy in a group of professors when I visited the Computer Science Department at Carnegie-Mellon University shortly before finding out I had cancer. Randy wrote this book shortly before he died from pancreatic cancer. I like his attitude, and try to keep mine as strong!
Definition: Character
See wrinkles
Hopefully, this will be the last day in this adventure. Peggy plans on doing the final painting and trimming today, and with luck, I will be done!
We started off with a visit from number 35. Dr. Cardoso wanted to see how the appliance he built worked in keeping my jaw stable as I slept last night. The news is good. Except for being a bit bulky, something I have to get used to, it worked just fine. I will use if for a while and make sure it does the job on a long term basis.
Both Peggy and Pattii were working on my final tune-up process. Peggy did a bit more sculpting and painting to add that "character" stuff, and we went over the procedure I will have to follow to glue the beast onto my face every time I want to wear it. The process involves cleaning the prosthetic, applying a water based glue, putting glue on my face as well, then carefully placing the prosthetic into position and sticking it on. It seems to be a one shot affair, once you stick it on, it is done. It acts like contact cement, so you need to practice to get the placement right. Otherwise, you will have a funny stare!
On the down side, do this wrong and it will fall off too soon! Then you have to clean everything off, and start over. It does seem possible to add a bit of glue around the edges if you notice it coming loose, but with no feeling on that side of my face, I probably will not notice it coming loose! I may have to get a pocket mirror to check it, and add that to the kit I will have to carry around which already needs to have more glue, tape, alcohol swabs. Oh, and the eye patch just in case. Add to that a case to hold everything. I might need a purse! (Maybe Cheryl will loan me one of here.
Here is a shot taken just before lunch:
If you are not looking for it, you will not notice it very much, even when my good eye moves around. That is one advantage to having "old" eyes with eyelids that are a bit droopy! Pattii will add another 20 years after lunch!
Cheap Version
They really should not leave me alone in the lab while they work in the shop area. I was sitting at the table with this cut-out picture of my eye, and came up with a cheap version of the prosthetic:
We are done!
Peggy walked in with the final product:
Just for the record, the official name for this gadget is "Orbital Eye Prosthetic". Sounds kinda spacey, which I like!
She has added fake eyelashes, since my eyelashes on the right side are visible. Finally, Peggy glued the new eye onto my face, and with the new face in place, Pattii took a few "official" pictures for their records:
And here is the view with the eye in place:
And, since I wear my hat when teaching, here is the teaching image:
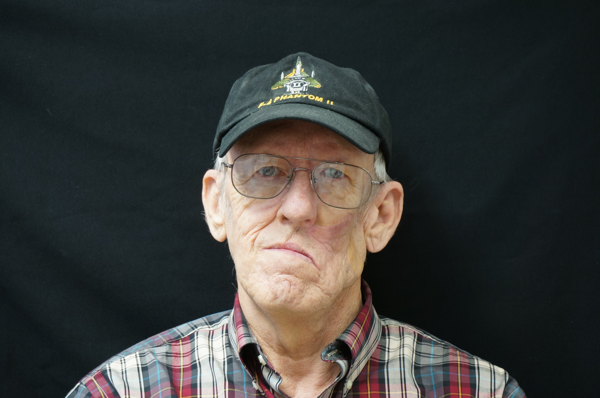
Not bad! I can certainly live with this look! It is amazing to see the final product, but a bit unnerving looking at it, since it looks so real! Isn't technology great!
Parting Shots
I had a bit of final training on how to remove the prosthetic and clean it up. They put everything I would need to put the prosthetic on and clean it off into a bag, and I was ready to continue with life!
Before I left, I asked number 35 to take a picture of the team who pulled this feat off:
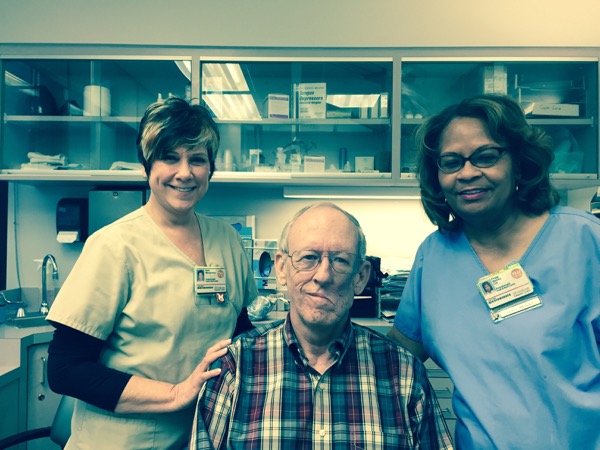
Patti said I needed a more natural shot:
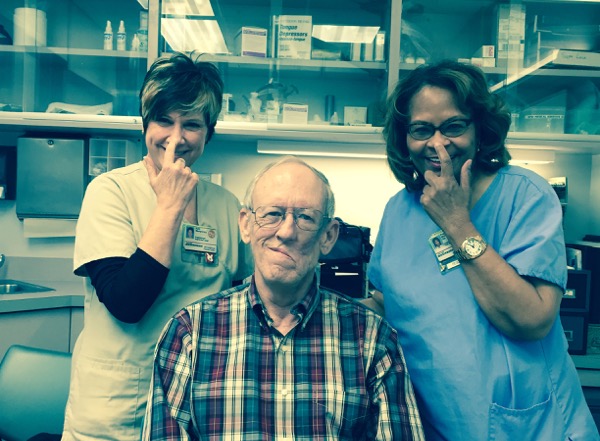
I stared at this view of each of them all of the time I was here. I will miss their noses! All in all, it was a great experience, and I think a worthwhile one. I can now look much more "normal" as I continue this battle against the beast called cancer!
I will drive back to Austin tomorrow, and spend the last week before classes start practicing installing my new face part. Unfortunately, it probably will not stay stuck on for some of my long days, so part of that process will involve figuring out how to reglue it on, or pull it off, clean it, and glue it back on. If all else fails (or falls off), I will just resort to my old eye patch. Perhaps I will use the paper eye over that (the cheap version!)
Comments
There are no comments yet.