Installing CLion
Read time: 44 minutes (11116 words)
There are many tools available for learning how to build programs on your personal computer. The problem I face in teaching this class is helping students do the projects on the machines they happen to own. More and more that means helping students who do not happen to own a Windows PC.
In the past, we have used Dev-C++ almost exclusively for this course. Unfortunately, that tool is Windows only. There are several other tools available, but none work well on all platforms.
In my quest to find one tool all students can use, I came across the CLion product. This is a Java-based application offered by the JetBrains company, which sells the product as a commercial program. The price is pretty high, but they are now offering free licenses to students. In fact, when you sign up with them, they let you install all of the products they sell, and they have an interesting set of offerings for all kinds of developers.
The CLion tool is a full featured IDE for developing several kinds of software products, including C++, which is just what we need. It is not aimed at beginners, meaning some of the ways you have to use this will not be simple for a beginner, but I will keep the need for doing anything difficult to a minimum.
Let’s give it a try!
Sign up on Jetbrains
We need to get you signed up as a student to use the package.
First, open up this link:
Click on the “Buy” tab, then select “Student Licenses”. Next, click on “Apply Now” and fill out the form. You must use your ACC email account to get this free license.
Once the form is complete, click on “Apply for Free Products”. You will get an email with a link to activate your license. After that has been done, you can download any JetBrains product you like.
Download CLion
Back on the JetBrains website, click on the “Tools” menu item. You will see a list of products offered by the company. Select “CLion”.
On this page, click on the “Download” button. On the next page, select your operating system and download the program. This should match your system. The file name I saw when installing this program was:
CLion-2017.3.3.dmg (on Mac)
CLion-2017.3.3.exe (On Windows)
Save this file on your system.
Installing the Program
Once the file is on your system, installing it is as simple as double-clicking on the file name using your file explorer tool. That will start the installation program. Follow the instructions and the program will install normally. (It may take a few minutes to complete. On my Mac, it was pretty quick!).
Warning
On my PC, there were pop-ups asking if I wanted to associate file extensions with this program. I do not do that, since I normally open up program files in my favorite Programmer’s Editor (Vim), not an IDE. If you think this would be useful to you, feel free to set this up, Then, when you double click on a file name in your file explorer tool, that file will automatically open up in CLion.
You might find exploring the JetBrains site for more information about this tool helpful. There are guides, demos, and other resources available. (Just be warned, they are not aimed at beginners. YMMV!)
Installing a Compiler
Unfortunately, CLion does not come with a compiler. Actually, this is not a bad thing. It will use whatever compiler you want. What that means is that we have to make sure we have a compiler installed before we can do much programming.
Before you get started, you need to see if your machine is a 64-bit system or a 32-bit system. They have not sold 32-bit machines for several years, but if you have such a machine, you need to know that for certain.
Identify Your Machine
If you have a label on your machine that says something like Intel Core I3, or I5, or even i7, you can stop now, you have a 64-bit system. Otherwise keep reading.
The first clue is probably the version of Windows you are using. If it is Windows 10, it is very likely that your machine is a 64-bit system.
Type Settings in the search box at the lower left corner of your screen.
Then click on System. In the window that opens, scroll down until you see
the About item. Click on that. ON my system I saw this line:
System Type: 64-bit operating system, x64-based processor.
On older systems, there is a System Info tab on the Control Panel that will
tell you what system you have, Unfortunately, all of my old PC systems have
gone away, so I cannot recreate the exact process. You may have to Google your
system model number (usually found on the back of the case) to figure this out.
Windows Compiler
I recommend the MinGW-W64 package for the PC. This is a set of tools for developers that were originally created in the Linux world, then ported to the PC. They are professional grade tools. Here is the link for the PC:
Click on the above link to download the installer.
Once that file is on your system, you can launch it by double-clicking on the file name. It should end up in your Downloads folder.
This is the first screen you will see:
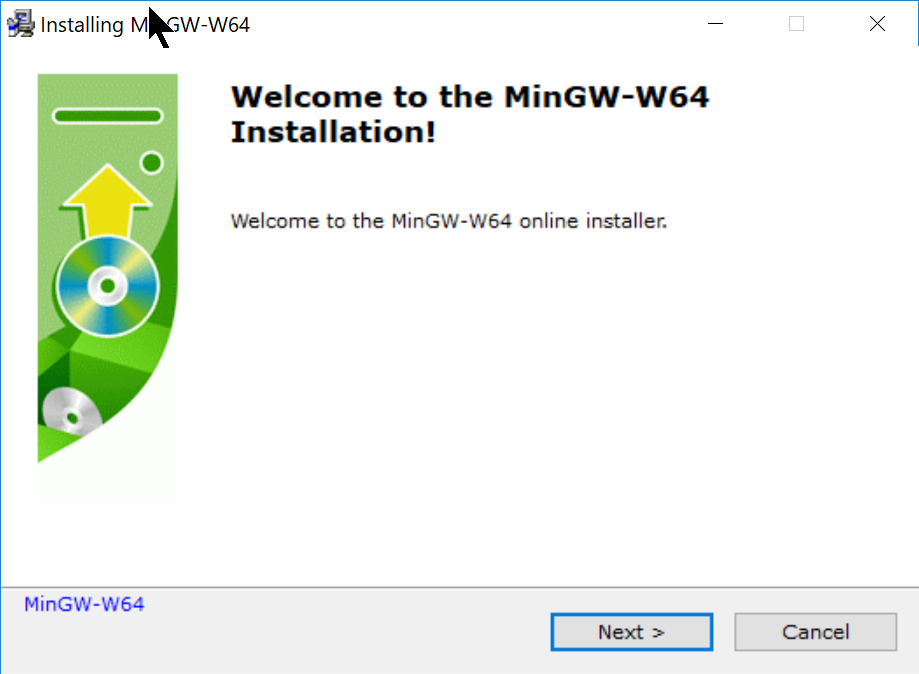
Click on the Next button. Here is what you should see:
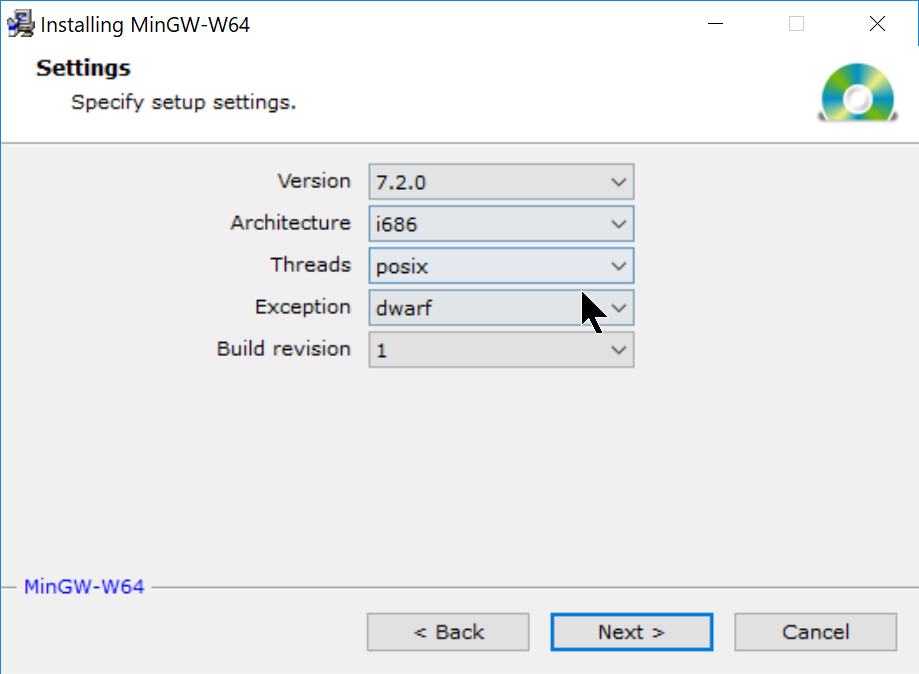
Warning
Here is where we need to be careful. I am not happy that the default screen is configured for 32-bit systems. The installer should be smarter than this! It is not going to cause problems if you install the 32-bit compiler on your 64-bit system for this class. If you make a mistake, you can rerun the installer and change the settings as shown below. I prefer to use the 64-bit compiler, since my machine supports that kind of code. Most modern programmers use 64-bit code since those machines dominate the market today.
If you have a 32-bit system, click on Next.
If you have a 64-bit system, you need to change these options so they look like this:

Note
The images shown from here on were taken as I installed the 64-bit version of the compiler on my Windows 10 machine.
Here is the next screen. There is no reason to change this, but note where the compiler is going to land. We may need that information later.
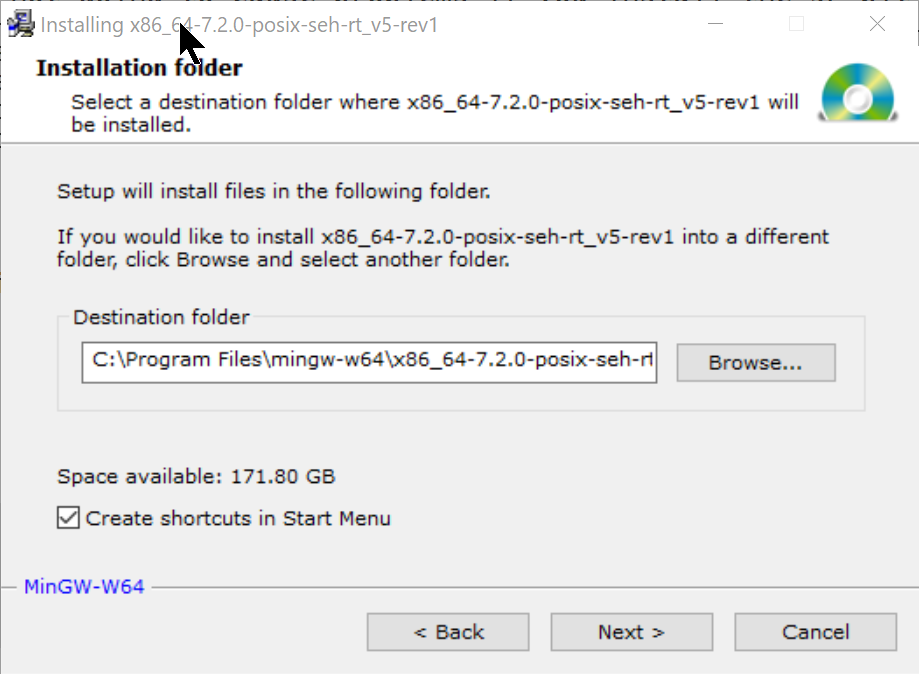
Click on Next. The compiler should install normally.
Check Compiler Settings
On my Windows 10 system, the CLion program had a problem finding the tools. In the end I manually configured the entries. This is the screen where I had to do this:
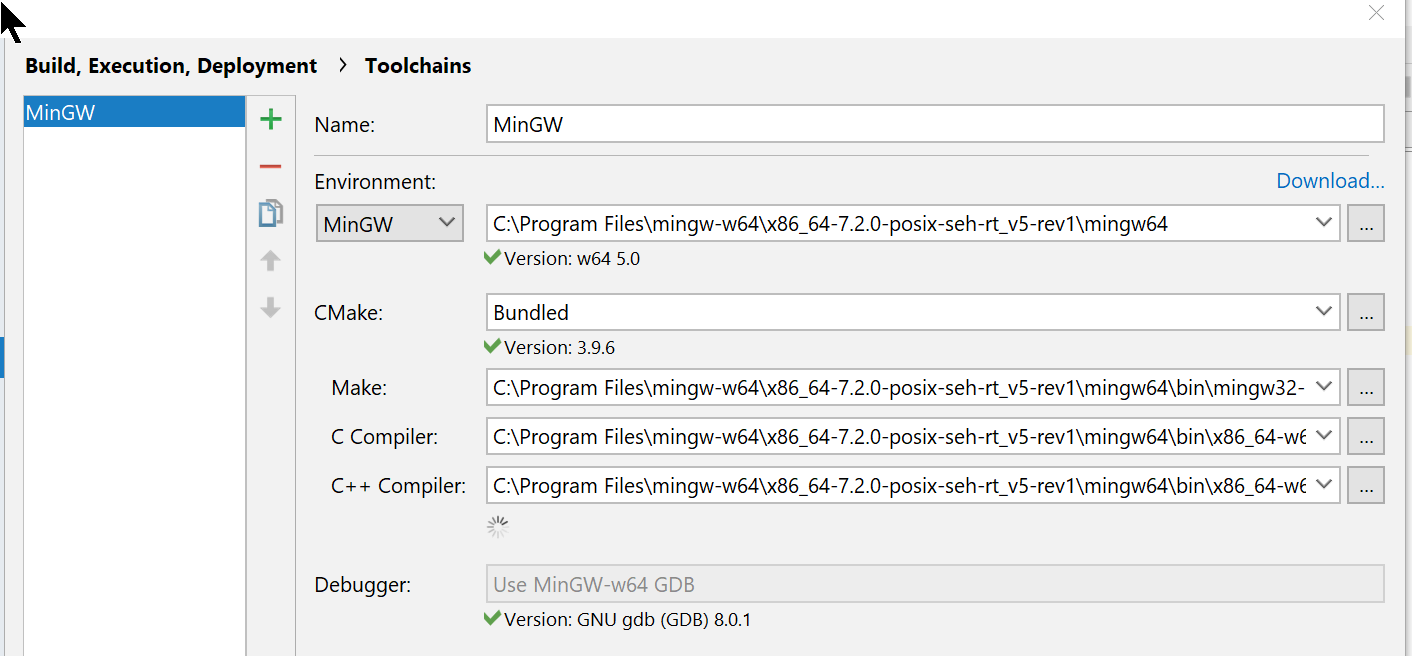
I had to click on the “browse” button (with the three dots) to find the files needed. The tools are these:
Make: mingw32-make.exe
C Compiler: x86_64-mingw32-gcc-7.2.0.exe
C++ Compiler: x86_64-mingw32-g++.exe
If your system works OK, you do not need to manually set things.
Mac Compiler
To run CLion on a Mac, you will need to install Xcode, which you can do using the “App Store”. This is a big package, and it will take a while to install, but it is essential to doing any programming on the Mac.
Once this is installed, start up CLion and it should find the compiler automatically.
Testing with Hello World
In keeping with tradition, we will test this tool by building a “Hello World” application.
Open the Program
Start the program using your usual scheme. The first time you open this program up, you might be asked if you want to import settings. Since we have no such things around, make sure the “Do not import settings” check box is clicked, and click on “OK”.
Next accept their Privacy Policy.
Now for the important part:
You need to select how you will use this program. You can either run it for 30 days as a demo, or activate it using the license you should have.
Select the “Jetbrains Account” option, then enter your user name and password (you set up earlier, after activating your student license).
Click on “Activate” and your installation be ready to run.
After Activation is complete, you get to select a “Theme”. I like light backgrounds, but you get to pick. (You can always change this later).
Start a C++ Project
Once the program is running, you need to create a new “Project”
Select “File->New Project”
Make sure C++11 is set as the language.
Save the Project
It is important that you control where your projects live. Every tool like CLion thinks they have the right idea where to put things. I never leave this decision to any program. I like to organize my files in a way that helps ME find things. For school, I set up a folder for each class, then under that folder, I create another folder for each project. You can see where I decided to put this example project from the top line in this image:
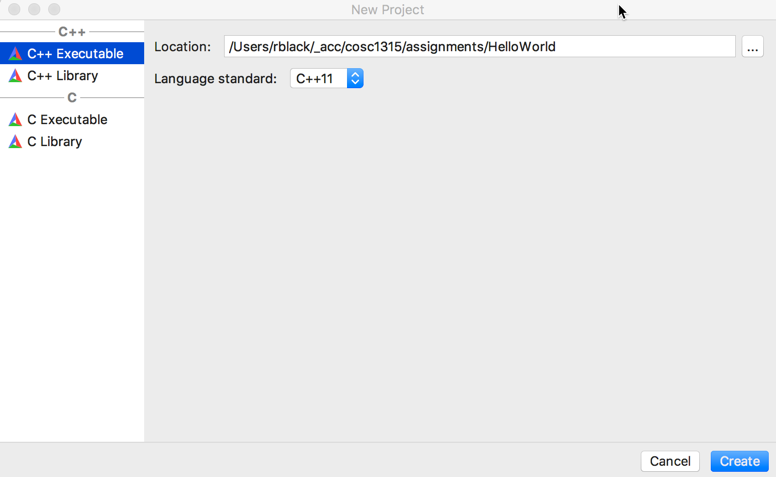
You should change the path for this project (at least change the “untitled” to something logical, like “HelloWorld”. I choose to keep my projects in a class folder named “cosc1315”)
Click on “Create” to build this project
Once the project is ready, you should see a basic “Hello, World” program in the edit window.
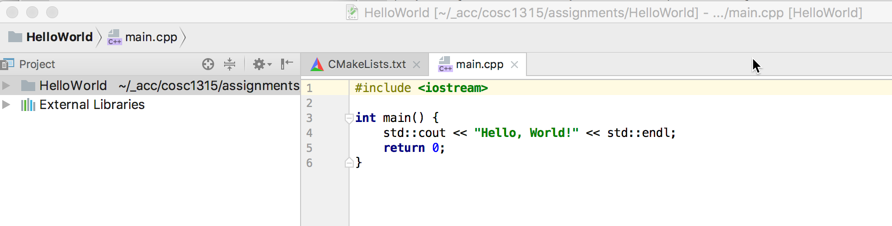
If you compare this example program with examples you find in the book, there is one big difference right away.
A typical “Hello World” example will look like this:
#include <iostream>
using namespace std;

int main(int argc, char * argv[]) {
    cout << "Hello, World!" << endl;
}
Notice that the CLion sample program does not include the “using namespace
std;’” line. Leaving that line out means we have to “qualify” both cout and
endl, as shown in the CLion code. Since most examples in the book include
that line, change this if you like. The compiler will tell you if something is
wrong.
Warning
You are going to be shocked when you start seeing the error messages the compiler generates. I am convinced the writers of that program never actually met a real human being, much less anyone who understands their messages. The best we can do is study the messages and try to find a clue as to what went wrong.
My “Baby Step” approach to programming helps here! , free to change this so it looks like the notes. You need to explore the editor in this program anyway.
On the left side is a navigation panel. Click on the small triangle next to the “HelloWorld” line and you will see a list of all files in the project folder. Your code is in “main.cpp”.
Note
When you work on programming projects for this class, you will need to submit the file containing the code you wrote. Do not submit any files I give you (graphics files, for example). I already have them on my grading system.
If you decided where to put this project, as I suggested, finding the file
to submit will be easy. It will end with .cpp.
In the list of project files, you will see one named CMakeList.txt. This
file is important. CLion uses a standard software tool named CMake to build
your program (it comes with CLion). That file is a text file used to control
how your program is compiled. We will need to work on that file in our graphics
labs, in fact, I will provide a complete replacement for this file so you can
work those labs. For now, peek at the file by double clicking on its name. The
edit window will show this file in a new tab. You can return to the program by
click on the tab with the desired file name.
Build Your Program
On the menu at the top, click on “Run -> Build”. You may be asked to do a bit of setup. If you see a form asking for the “Executable” name, select your project name. This will be the name used on the executable file the compiler will build. After finishing this form, the compiler will process your code.
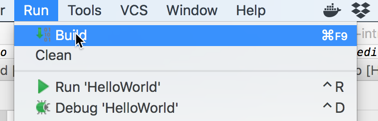
This will compile your program. If there are no errors, you can click on the “Run->run” menu item to run your code. You will see the output in the bottom window. Any error you encounter will be displayed here as well.
If you get this far, you are ready for standard “console applications” that display text on the screen. To do some fun graphics labs, you will need to do a bit more work. We will get to that after the first exam.