Lab10: PiBrot
To give you a taste of what it is like to work with “Embedded Computers”, for our final project you will install your Mandelbrot code on a Raspberry Pi computer and see if you can get it running there.
I will provide a Pi to each team, and your job will be to set it up, then get the development environment set up. Once that has been done, you will clone your Mandelbrot project and see if you can get it to run on this tiny computer.
The Pi is hugely popular in the Hobby/Education worlds. The machine is inexpensive (around $35) and has enough horsepower to run Linux. The processor on the board is an ARM, which powers a variety of commercial products.
The lab kit will contain the following components:
Raspberry PI Board (Models 0 and 3 are available)
Power supply (2.5 amp 5V wall-wart supply)
32GB Micro HD flask card with an adapter
HDMI cable (only for Pi3 models)
Setting Up the System
Either of these systems can be set up to run “headless”, meaning they run wi no keyboard, mouse, or monitor. In this configuration, you access the machine just like a remote server, logging in to a terminal interface.
Pi Zero
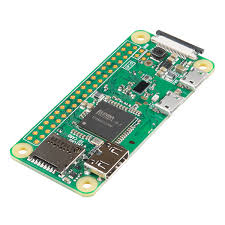
The Pi0 is a small board designed to run using a wifi to connect. However, it is possible to convince it to connect to your laptop using just a USB cable. A bit of research will turn up instructions. Using this setup, your Pi should be able to reach the Internet through your laptop connection.
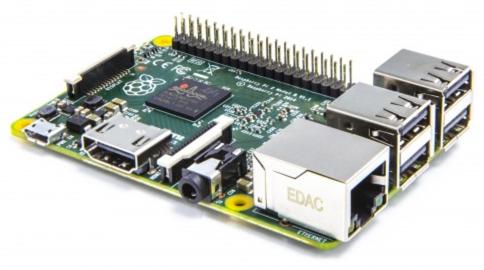
Pi Model 3
To set this system up, you can use a keyboard and mouse with a standard USB interface. The provided HDMI cable can attach to many monitors, or your big-screen TV! If you have a standard Ethernet network cable, you can hook the PI up to your laptop, or to your home router and reach the internet. The board also supportds WiFi, but it is not currently possible to get it to work on the ACC wireless network!
Tuning your Project Code
This project should not require any significant changes to your code, and is a good example of building applications that can run on a variety of systems.
Warning
When working with completely different processors using the same code base, it is critical that you remember to do a “make clean” before attempting to compile your code. Object files produced on one machine will absolutely not work on a different processor. The compiler you use will be basically the same, but the one on the Pi is building code for an ARM processor, not a Pentium!
For this project, your team will need to write up the work you did to get things running on the Pi. Each team member is expected to document one part of this effort.
Here is a suggested topic list
Basic overview of the Raspberry Pi
Basic Pi Setup
Installing the development tools on the Pi
Project Demonstration setup
Each team will present their project in class on the last day, the demo may be done on the Pentium, since it is difficult to get Pi boards working in class, due to the strict ACC security and lack of proper connections in the classroom.
If you manage to get the Pi working through your laptop, you can show that setup in class as well.
We have four weeks remaining in the class. Obviously, this should be completed by the end of the term.