GitHub Classroom Projects
Read time: 47 minutes (11831 words)
To get started using GitHub, we will need to learn a few new terms, and use new tools. Assuming you worked through installing the needed tools, we are ready to check your system, and get you started.
Fire up a Command Prompt
We will do everything here at the command line. These notes assume you are working in your virtual machine with Ubuntu Linux installed.
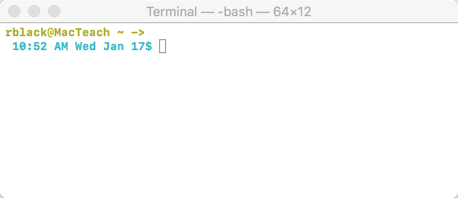
Begin by starting the Term program.
The window that opens looks pretty stark! You should see the
“prompt”, which is a line ending with a $ character.
Note
Since the commands we wiii go over work equally well on a Mac, I will show things from a Mac session.
Here is my default window:
Finding a Home for Your Work
Before you do anything else for this class, create a single directory (OK,
folder if you insist) where all classwork will be located. Inside that
directory, we will place several other sub-directories as we work through the
class. I am going to assume you will place this class directory in your “Home”
folder. On Linux, the home directory is under /home/username (note the
use of forward slashes here. Only Windows uses backward slashes!)
Here is how you create the folder, after opening up a command-prompt
window:
rblack@cosc2325vm:~$ mkdir cosc2325
The prompt shows my username and the machine name. The fullt squiggle is an alias (short!) for my home directory.
Now, move into that new directory for the rest of this lecture:
$ cd cosc2325
rblack@cosc2325vm:!/cosc2325$
Notice that the prompt now shows the path to the current directory. We still see that funny squiggle, but that is fine.
The first thing we need to do is check that all the needed tools are installed.
Preflight Checks
OK, so I am a pilot! A “preflight” is something you do before you ever fire up the engine on an airplane. Here, we need to make sure all the tools you will need are properly installed for use on the command line.
There are five basic tools we need to do our work:
The messages you will see as we check things are sometimes pretty long. I have truncated them in these notes. If the exact versions are different, see me to make sure you are not using software that is out of date.
Checking Your Tools
Here are the checks we need to make sure these tools are available. The actual response has been truncated, leaving off things like a copyright notice and other details we do not need to worry about.
Programmer’s Editor
I do not require that you use Vim (or gVim), but learning this editor will be very useful to you. Here is a check to see that it is installed:
Note
From here on, I am going to shorten the prompt to just the dollar sign, to save some typing!
$ vim --version
VIM - Vi IMproved 8.0 (2016 Sep 12, compiled Nov 29 2017 18:37:46)
Included patches: 1-503, 505-680, 682-1283
You can use Vim from the command line, or start the GUI version (gVim). The real difference is that with the GUI version, you can use your mouse to move the cursor and select things.
Note
I usually open up the GUI version to edit files, then leave the edit window open. I then start a command prompt window in the same directory. You can switch back and forth, editing and running using that scheme.
Make
As we work through the course, you will start getting irritated by the need to
type in long commands all the time. You are not alone in that. Back in 1976,
another developer got sick enough of that to build a tool that issued commands
for him. That tool has been a part of the development landscape ever since. We
will use it as well. The tool is called make, since it is used primarily to
“make” programs. (Creative name, huh?)
$ make --version
GNU Make 4.1
C/C++ Compiler
If you are learning Python, you can skip this one. You will see it soon enough!
$ g++ --version
g++ (Ubuntu 7.3.0-27ubuntu1-18-04) 7.3.0
Python
All of my students will need Python. Even though we will be writing a lot of coe using C/C++ will need Python for documentation. More on that later in the course!
Warning
On Mac/Linux you need to run python3 to get the modern version of
Python. Be careful about that!
$ python3 --version
Python 3.6.7
With all of these tools ready for use, we can now turn to actually setting up places where we will build our projects.
Configuring Git
When you first start using Git these are some setup steps you need to do.
Registering your Identity
The most important step tells Git who you are. This information is recorded when you record changes in a project. Although this is not that important when you work alone, it is critical in team work. This information can help identify who made some change, and finding that person might be vital to figuring out what.why things changed.
$ git config --global user.name "John Doe"
$  git config --global user.email johndoe@example.com
of course, you should use your own credentials here!
This creates a .gitconfig file in your “home directory” with this data, and a bit more stuff Git uses. To see where this file is on your system, yo can type this:
$ git config --global --list
If the file does not exist, you will see a message telling you when Git expected to find it. If it does exist, you will see what is in that file.
Note
You only do this step once.
Git Repositories
Git, like all seasoned developers, keeps everything needed to build a program in a single directory. Usually, we name that folder something to help us know what project the folder is all about.
Git calls a managed folder a “repository”. The only difference between a repository and a normal folder is the presence of a hidden subdirectory Git uses to store all of its working data.
We set up a folder for all class projects earlier in this note. In that
directory, we will “clone” class project repositories. You should already have
a homework-username repository in your account on GitHub. We will get a
copy of that folder in your VM as follows:
Create a “Working Copy”
The “master” copy of your work is always going to live on GitHub. You will never work directly on that version. Instead, we will make a “working copy” of the project on your development workstation. To get this copy, we will “clone” the master copy using Git
Make sure you are in your class folder (named after the class). Then run this command on the command line:
$ git clone https://github.com/ACC-COSC2325-003-SP19/homework-username
Of course, you need to make sure that line is correct for your section/username.
When this command runs, your system will connect with GitHub. You will be asked to provide your GitHub username and the password you set up on that system. Git will then download your project repository.
You might see a message indicating that you have cloned an empty repository. You will not see this if you already managed to get a README.rst file in your repo!
The directory it creates has one very important folder hidden inside it.
$ cd homework-rblack42
$ ls -al
total 12
drwxr-xr-x 3 rblack rblack 4096 Jan 27 17:48 .
drwxr-xr-x 3 rblack rblack 4096 Jan 27 17:48 ..
drwxr-xr-x 3 rblack rblack 4096 Jan 27 17:48 .git
I first moved into my project folder using the cd (change directory)
command. Then I used the ls command (short or “list” with a special
option to show me hidden files and folders in this directory. Any file with a
name that begins with a “dot” is treated as “hidden” and you normally will not
see it when you look at things in a directory.
That .git directory is vital to Git. Under that directory, Git will keep
everything it needs to track your project and all of the versions you create.
Check your GitHub Connection
When you “clone” a project repository, Git keeps track of where it came from. The name it uses for the server (GitHub) is “remote”. We can make sure we are hooked up to GitHub properly by doing this:
$ git remote -v
origin      https://github.com/ACC-COSC2325-003-SP19/homework-rblack42 (fetch)
origin      https://github.com/ACC-COSC2325-003-SP19/homework-rblack42 (push)
This shows the correct connection.
Ignoring Unneeded Files
When you start working in a new repository, it is a good idea to tell Git what kinds of files to “ignore”. These files are things you can rebuild later, or just do not want stored on GitHub. Here is the file I use for class work (it handles Python and C/C++ files I generate).
Open up your editor in the directory where the .git subdirectory is located.
> vim .gitignore
Type this in:
# Python projects
*.py[cod]
__pycache__

# Vim files
*~
*.swp

# C/C++ projects
*.o
*.a
We will add a few more lines to this file as we move through the course.
Add a “README” file
Most projects you see on GitHUb have a file named README (possibly with an extension) at the top of the project repository. This file is supposed to provide useful informtion to folks exploring your project.
Let’s add such a file in our project repository (if it is not already there),
and get it on the server. Make sure you are working inside of this repository
folder, then open up your editor and create a file named README.rst. The
contents of this file should look like the example provided in the homework you
already completed (right?)
See What Git Thinks
Let’s ask Git to check our project now:
$ git status
On branch master

No commits yet

Untracked files:
  (use "git add <file>..." to include in what will be committed)

    README.rst

nothing added to commit but untracked files present (use "git add" to track)
This is showing you that there is a new file under your project directory (Duh!)
We need to “add” this file to our project.
Huh! We just did that!
Git does not track files unless you tell it to. Often, there will be files in your project folder you do not want on GitHub. Those files are usually ones we can recreate using the files we do track.
We want to track this one, so we will use this command:
$ git add .
Look closely, there is a dot at the end of that line! Git said nothing in response to this. Let’s see what it thinks now:
$ git status
On branch master

No commits yet

Changes to be committed:
  (use "git rm --cached <file>..." to unstage)

    new file:   README.rst
Hmmm, the new file is now marked as a new file!
“Commit” this Version
Now for the big step. We want to officially tell Git to track this version of our project. Git will wrap up all files it sees at this moment, put a timestamp on it so we can return here later if needed.
Do this:
$ git commit -m "added README file"
[master (root-commit) b30fd73] added README
 1 file changed, 0 insertions(+), 0 deletions(-)
 create mode 100644 README.rst
That message is important. We are “committing” this version, and adding a
message telling us what we did. Some developers are fanatic about the messages.
They end up in a log we can browse later to see how things changed. That log
can help you return to an earlier version if needed. If you fail to add that
message (and the -m flag) Git will launch your editor and make you say
something. Save yourself the hassle of that and always add a message.
Now check to see what Git thinks:
$ git status
On branch master
Your branch is based on 'origin/master', but the upstream is gone.
  (use "git branch --unset-upstream" to fixup)

nothing to commit, working tree clean
This is good. Git has a snapshot of your project safely tucked away. All that remains is to get this on GitHub):
Push To GitHub
This step is easy. Well it is except for providing your credentials again!
$ git push origin master
Counting objects: 3, done.
Writing objects: 100% (3/3), 216 bytes | 216.00 KiB/s, done.
Total 3 (delta 0), reused 0 (delta 0)
To https://github.com/ACC-COSC2325-003-SP19/homework-rblack42
 * [new branch]      master -> master
Now, check Git one last time:
> git status
On branch master
Your branch is up to date with 'origin/master'.

nothing to commit, working tree clean
This is what you want to see before you walk away from a development session. What it means is that you have an exact copy of all of your work safely on your machine, and on GitHub.
Check GitHub
I recommend opening up your web browser and finding your project repository
there. What you will see may surprise you. That README.rst file is proudly
displayed on the project page, nicely formatted. Git processes any file named
“something.rst” assuming it is a file written in reStructuredText notation. The text we
wrote is in this format. We will see more of this notation later.
Break Time! Walk Away
When you get here, it is safe to walk away from your project. Even if someone steals your development machine, we could “clone” another copy to a different machine, install the needed tools, and continue work.
It is not uncommon for developers to use several machines in ther work. I have PC, Mac, and Linux machines available, and can (and do) test things on all three platforms to make sure my projects really are ready for use in the “wild”!
Set Up a Playground
I always recommend that you set up separate directories where you can “play”. The work you do here is experimental, and when you figure something out that seems to work, you copy the new idea into a managed project. DO not play in a real project, you might mess things up. Git will help protect you, but it is good practice to be careful when you code for real.
I also set up another directory where I can clone interesting projects I find on GitHub. Doing this is for study purposes. You can almost always find code on GitHub that will help you learn new techniques, languages, etc. My laptop has over 50 cloned projects now. I can try them out, and study them as I like.
Here are the folders I create for a class:
$ mkdir sandbox
$ mkdir github
Guess why I named the first one “sandbox”. You may need to remember what it was like being a kid!
Warning
NEVER clone a repository into another repository. Both of the folders above will live beside any repositories i build for my class work. Accidentally putting one repository inside another one is a very common mistake for beginners to make. Be careful not to do this!
At this point, you are ready to submit real assignments. Check the HW2 link
for further guidance on doing that!
